
Introduction
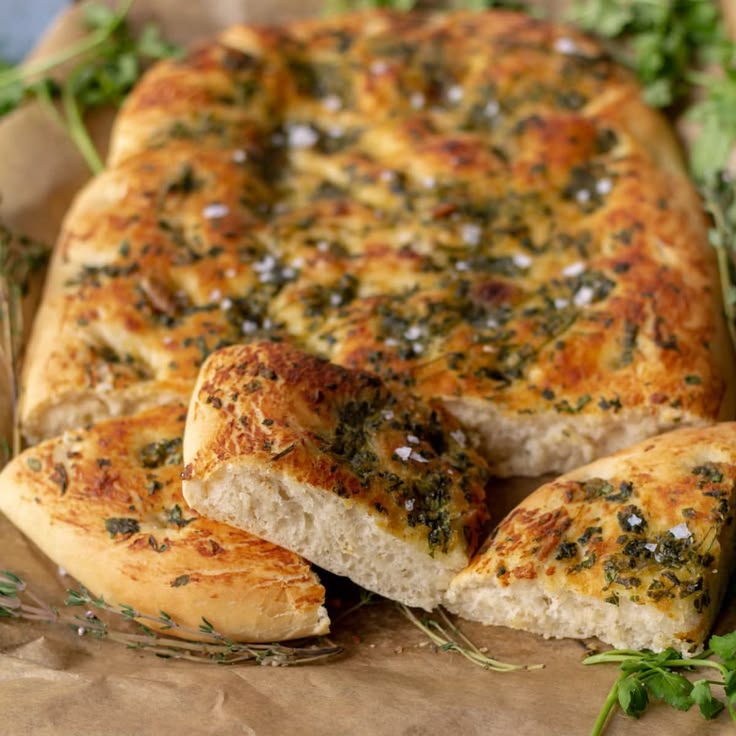
Get ready to fall in love with homemade bread! Our Garlic Herb Focaccia is a true delight. It’s a soft, airy Italian flatbread, generously infused with fragrant garlic and aromatic herbs. Each bite offers a crispy, golden crust and a tender, chewy interior, making it incredibly satisfying.
You might think making bread is complicated, but this focaccia recipe proves otherwise. It’s surprisingly simple and very forgiving, perfect for beginners. Most of the work is hands-off, letting the dough do its magic during rising. With just a few basic ingredients, you can create something truly spectacular.
Imagine the aroma filling your kitchen! This focaccia is perfect for sharing, dipping in olive oil, or serving alongside your favorite meals. So, gather your ingredients, put on some music, and let’s bake some incredible Garlic Herb Focaccia together!
Cooking Time & Prep Time
- Prep Time: 25 minutes
- First Rise: 1.5 – 2 hours
- Second Rise: 30 – 45 minutes
- Cooking Time: 20 – 25 minutes
- Total Active Time: 45 – 50 minutes
- Total Time (including rises): 2 hours 55 minutes – 3 hours 35 minutes
Small tip: The rising times can vary based on your kitchen’s temperature. A warm spot will speed things up!
Ingredients
This recipe makes 8-10 servings.
For the Focaccia Dough:
- 2 ¼ teaspoons (1 packet) active dry yeast
- 1 ½ cups warm water (105-115°F / 40-46°C)
- 1 teaspoon granulated sugar
- 3 ½ cups all-purpose flour, plus extra for dusting
- 1 ½ teaspoons fine sea salt
- ¼ cup extra virgin olive oil, plus more for the pan and drizzling
For the Garlic Herb Topping:
- 3-4 cloves garlic, minced
- 2 tablespoons fresh rosemary, finely chopped
- 1 tablespoon fresh thyme, finely chopped
- 1 teaspoon flaky sea salt
- 2 tablespoons extra virgin olive oil
Step-by-Step Instructions
-
Step 1: Activate the Yeast
In a large mixing bowl, combine the warm water and granulated sugar. Sprinkle the active dry yeast over the top. Let it sit for 5-10 minutes until it becomes foamy. This shows your yeast is alive and ready to work!
Small tip: If your yeast doesn’t foam, your water might be too hot or too cold, or your yeast might be expired. Start again with fresh yeast and the correct water temperature.
-
Step 2: Mix the Dough
Add the flour and fine sea salt to the yeast mixture. Stir with a wooden spoon or your hands until a shaggy, sticky dough forms. It doesn’t need to be perfectly smooth at this stage. Just ensure all the flour is incorporated.
-
Step 3: First Rise
Drizzle 2 tablespoons of olive oil over the dough. Turn the dough over a few times to coat it lightly with oil. Cover the bowl with plastic wrap or a clean kitchen towel. Place the bowl in a warm spot and let it rise for 1.5 to 2 hours, or until it has doubled in size.
Small tip: If your kitchen is cool, you can place the bowl in an oven that’s turned off, with just the light on, to create a warm environment.
-
Step 4: Prepare the Baking Pan
Generously drizzle 2-3 tablespoons of olive oil into a 9×13 inch baking pan (or a similar size). Make sure the bottom and sides are well coated. This prevents sticking and contributes to that delicious crispy crust.
-
Step 5: Transfer and Stretch the Dough
Gently pour the risen dough into the prepared baking pan. Be careful not to deflate it too much. Use your oiled fingertips to gently stretch the dough to fill the pan. If it springs back, let it rest for 5-10 minutes, then continue stretching. You want an even layer.
-
Step 6: Second Rise and Dimpling
Cover the pan loosely with plastic wrap or a clean towel. Let the dough rise for another 30-45 minutes. It should look puffy and slightly bubbly. After the second rise, drizzle another tablespoon of olive oil over the dough. Use your oiled fingertips to gently press deep dimples all over the surface of the dough, without pressing all the way through.
Small tip: Oiling your hands before dimpling prevents the dough from sticking to your fingers.
-
Step 7: Add the Topping
In a small bowl, combine the minced garlic, chopped rosemary, chopped thyme, and 2 tablespoons of olive oil. Mix well. Spoon this mixture evenly over the dimpled dough. Sprinkle generously with flaky sea salt.
-
Step 8: Bake the Focaccia
Preheat your oven to 400°F (200°C). Bake the focaccia for 20-25 minutes, or until it’s golden brown on top and the edges are crispy. The crust should look deeply golden, almost caramelized in spots.
-
Step 9: Cool and Serve
Once baked, remove the focaccia from the oven. Carefully lift it out of the pan and transfer it to a wire rack to cool slightly. Letting it cool for 10-15 minutes before slicing helps it set and makes it easier to cut. Slice into squares or rectangles and serve warm.
Small tip: A cooling rack prevents the bottom from getting soggy.
Tips & Variations
- Gluten-Free Option: You can substitute the all-purpose flour with a 1:1 gluten-free all-purpose flour blend (ensure it contains xanthan gum). The dough might be a bit stickier, but it will still yield delicious results.
- Vegan Option: This recipe is naturally vegan! No substitutions needed. It’s a wonderful plant-based bread.
- Add More Vegetables or Protein: Before dimpling, scatter cherry tomato halves, thinly sliced red onion, black olives, or even crumbled vegan feta cheese over the dough. For protein, cooked and crumbled vegan sausage or chickpeas could be added.
- Spicy Version: For a kick, sprinkle a teaspoon of red pepper flakes over the dough along with the herbs and garlic. You can also add a pinch of cayenne pepper to the dough mixture.
- Other Flavor Tips: Experiment with different herbs like fresh oregano or sage. A sprinkle of grated Parmesan (or vegan Parmesan) after baking adds a cheesy touch. Sun-dried tomatoes or caramelized onions are also fantastic additions.
Nutritional Information
Approximate values per serving (based on 10 servings):
- Calories: 280
- Protein: 7g
- Carbohydrates: 40g
- Fat: 10g
Please note: These values are approximate and may vary depending on the specific ingredients and brands used.
Health Benefits
Our Garlic Herb Focaccia isn’t just delicious; it also packs some healthy benefits from its key ingredients!
Olive Oil: This Mediterranean staple is rich in monounsaturated fats, which are known to be heart-healthy. It can help lower bad cholesterol levels and is packed with antioxidants, which fight inflammation and protect your cells.
Garlic: A true superfood! Garlic is renowned for its immune-boosting properties. It contains allicin, a compound with powerful medicinal benefits, including antioxidant and anti-inflammatory effects. It’s also a good source of Vitamin B6 and Manganese.
Rosemary and Thyme: These aromatic herbs are more than just flavor enhancers. Rosemary is full of antioxidants and anti-inflammatory compounds, which may help improve digestion and memory. Thyme is a good source of Vitamin C and Vitamin A, and also has antiseptic properties.
Yeast: Active dry yeast, while primarily for leavening, also contributes B vitamins to the bread. These vitamins are essential for energy production and maintaining healthy nerve function.
Serving Suggestions
- With Dips: Serve warm with a small bowl of high-quality extra virgin olive oil for dipping, perhaps with a dash of balsamic vinegar.
- Soup & Salad Companion: This focaccia is the perfect accompaniment to a hearty minestrone soup or a fresh Caprese salad.
- Sandwich Base: Slice it horizontally and use it as a flavorful base for sandwiches. Fill with roasted vegetables, mozzarella, pesto, or your favorite deli meats.
- Appetizer Platter: Cut into small squares and arrange on a platter with olives, cheeses, and cured meats for an impressive appetizer.
- Main Dish Side: It pairs wonderfully with grilled chicken, fish, or any Italian-inspired main course.
Storage Tips
Leftover focaccia can be stored in an airtight container or wrapped tightly in plastic wrap at room temperature for up to 2-3 days. For longer storage, you can freeze individual slices or the whole loaf, wrapped well in plastic wrap and then foil, for up to 1 month. To reheat, simply warm slices in a toaster oven or a regular oven at 350°F (175°C) for 5-10 minutes until warmed through and crispy again.
Conclusion
There you have it – a truly irresistible Garlic Herb Focaccia! This bread is more than just a recipe; it’s an experience. From the satisfying process of making the dough to the incredible aroma that fills your home, every step is a joy. The soft, airy texture and the burst of garlic and herb flavors make it a guaranteed crowd-pleaser.
Don’t be shy, give this recipe a try! You’ll be amazed at how simple it is to create such a professional-tasting loaf right in your own kitchen. It’s a wonderful way to enjoy the magic of homemade bread without any fuss.
So go ahead, bake a batch, and share the warmth and deliciousness with your family and friends. They’ll thank you for it! Happy baking!


