
Introduction
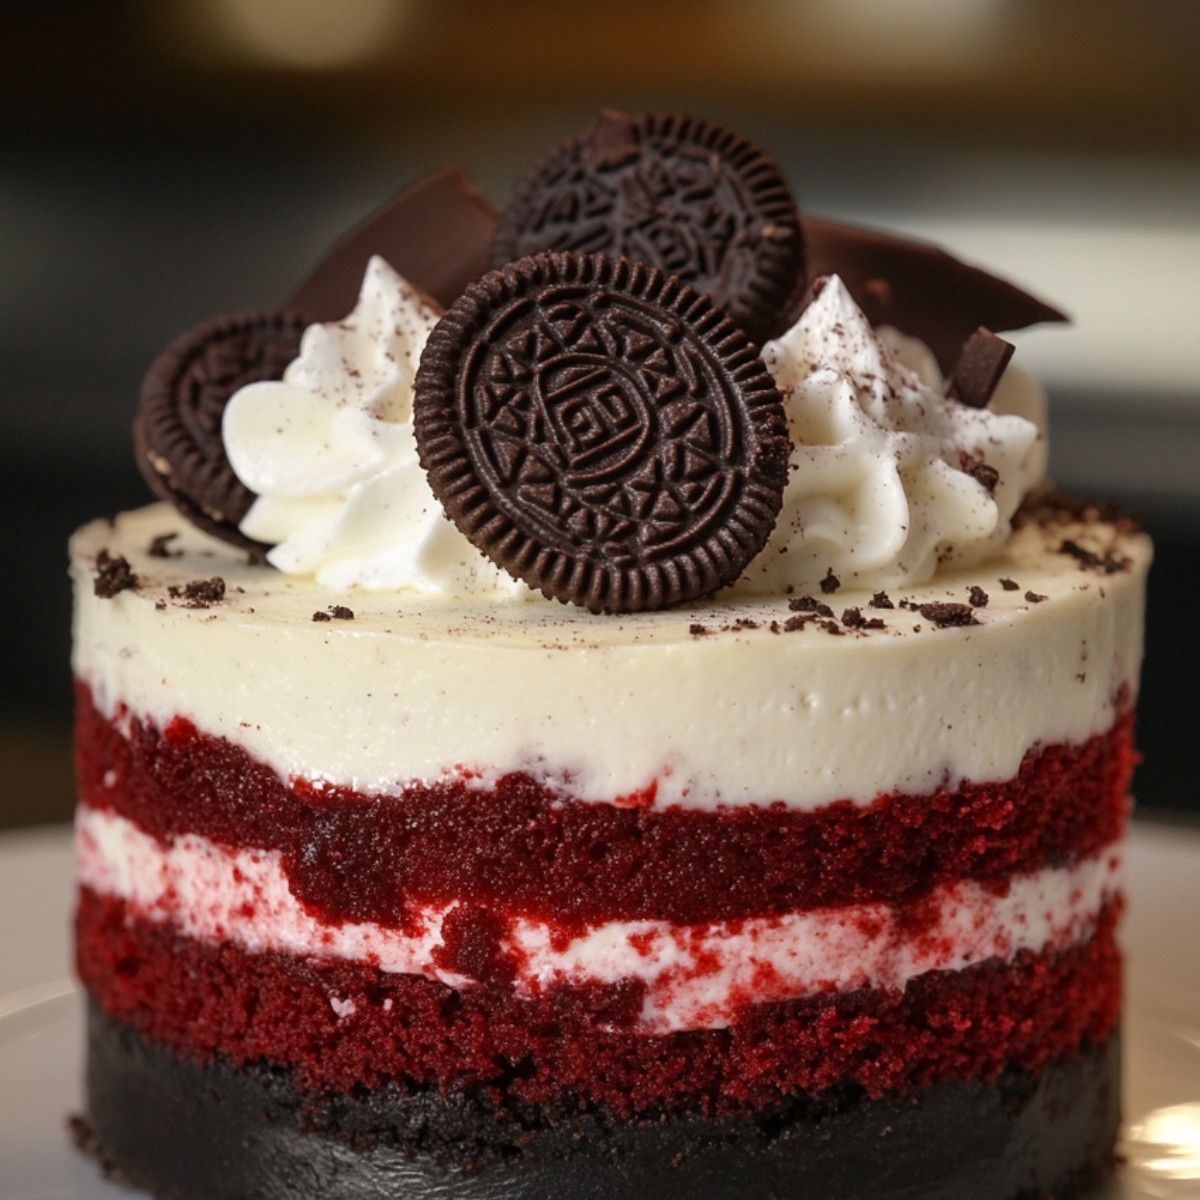
Get ready for a dessert that’s truly out of this world! Our Red Velvet Oreo Cake takes two beloved classics and marries them into one spectacular treat. Imagine the rich, tender crumb of a red velvet cake, subtly kissed with cocoa, generously studded with crunchy Oreo pieces. Then, picture it all enrobed in a luscious, tangy cream cheese frosting, also brimming with more crushed Oreos. It’s a symphony of textures and flavors that will delight your taste buds.
This cake might look impressive, but don’t let its grandeur fool you. It’s surprisingly straightforward to make, even for novice bakers. We break down each step into simple, manageable instructions. You’ll be amazed at how easily you can create a show-stopping dessert that tastes like it came straight from a gourmet bakery. The magic is in combining readily available ingredients and following our clear guidance.
Whether you’re celebrating a special occasion, hosting a gathering, or simply craving something wonderfully indulgent, this Red Velvet Oreo Cake is your answer. It’s comforting, exciting, and utterly delicious. So, put on your apron, gather your ingredients, and prepare to bake a cake that everyone will rave about. Let’s get baking!
Cooking Time & Prep Time
- Prep Time: 45 minutes
- Cooking Time: 30-35 minutes
- Total Time: 1 hour 15 minutes – 1 hour 20 minutes (plus cooling time)
Small tip: To save time, you can prepare the cake batter while your oven preheats. This ensures everything is ready to go into the oven without delay.
Ingredients
Makes 12 generous servings
For the Red Velvet Oreo Cake Layers:
- 2 ½ cups (300g) all-purpose flour, sifted
- 1 ½ cups (300g) granulated sugar
- 1 tablespoon unsweetened cocoa powder (Dutch-processed for a richer color)
- 1 teaspoon baking soda
- 1 teaspoon salt
- 1 cup (240ml) buttermilk, at room temperature
- ½ cup (120ml) vegetable oil (or other neutral oil)
- 2 large eggs, at room temperature
- 1 teaspoon vanilla extract
- 2 tablespoons red food coloring (gel works best for vibrant color)
- 1 teaspoon white vinegar
- 1 cup (about 12-15 cookies) Oreo cookies, finely crushed
For the Oreo Cream Cheese Frosting:
- 16 ounces (450g) cream cheese, softened
- 1 cup (226g) unsalted butter, softened
- 4-5 cups (480-600g) powdered sugar, sifted (adjust to desired sweetness)
- 1 teaspoon vanilla extract
- Pinch of salt
- ½ cup (about 6-8 cookies) Oreo cookies, finely crushed
For Garnish:
- 4-6 whole Oreo cookies, roughly chopped or left whole
Step-by-Step Instructions
-
Step 1: Prepare Your Baking Pans
Preheat your oven to 350°F (175°C). Grease and flour two 8-inch round cake pans. You can also line the bottoms with parchment paper for easy removal. This step ensures your beautiful cake layers won’t stick.
Small tip: For perfectly flat cake layers, you can use baking strips around your pans. Soak them in water and wrap them around the outside of the pans before baking.
-
Step 2: Combine Dry Ingredients
In a large bowl, whisk together the sifted all-purpose flour, granulated sugar, cocoa powder, baking soda, and salt. Make sure there are no lumps and the ingredients are evenly distributed. This forms the base of your cake batter.
-
Step 3: Mix Wet Ingredients
In a separate medium bowl, whisk together the buttermilk, vegetable oil, eggs, vanilla extract, and red food coloring. Whisk until everything is well combined and the color is uniform. This liquid mixture will bring your cake to life.
-
Step 4: Combine Wet and Dry Mixtures
Gradually add the wet ingredients to the dry ingredients, mixing on low speed with an electric mixer or by hand until just combined. Be careful not to overmix the batter. Overmixing can lead to a tough cake.
-
Step 5: Add Vinegar and Oreos
Stir in the white vinegar. Then, gently fold in the finely crushed Oreo cookies. The vinegar reacts with the baking soda and buttermilk to give the cake its classic tender texture and slight tang. The Oreos add a delightful crunch.
-
Step 6: Bake the Cake Layers
Divide the batter evenly between the two prepared cake pans. Bake for 30-35 minutes, or until a wooden skewer inserted into the center comes out clean. Baking times can vary, so keep an eye on your cakes.
-
Step 7: Cool the Cake Layers
Once baked, let the cake layers cool in their pans on a wire rack for about 10-15 minutes. Then, carefully invert them onto the wire rack to cool completely. The cakes must be entirely cool before frosting, or your frosting will melt.
-
Step 8: Prepare the Cream Cheese Frosting
While the cakes are cooling, beat the softened cream cheese and softened unsalted butter together in a large bowl until smooth and creamy. Use an electric mixer on medium speed. Scrape down the sides of the bowl as needed.
-
Step 9: Finish the Frosting
Gradually add the sifted powdered sugar, vanilla extract, and a pinch of salt to the cream cheese mixture. Beat on low speed until combined, then increase to medium-high and beat until light and fluffy. Don’t overbeat, or it can become too thin.
-
Step 10: Add Crushed Oreos to Frosting
Gently fold in the ½ cup of finely crushed Oreo cookies into the cream cheese frosting. This adds extra texture and Oreo flavor to every bite. Reserve some for garnish if you like.
-
Step 11: Assemble and Frost the Cake
Place one cooled cake layer on your serving plate or cake stand. Spread a generous layer of Oreo cream cheese frosting over the top. Carefully place the second cake layer on top. Frost the top and sides of the entire cake evenly. Decorate with chopped or whole Oreo cookies as desired.
Small tip: Use an offset spatula or a bench scraper for smooth frosting results. Chill the cake briefly if the frosting becomes too soft while you’re working.
-
Step 12: Chill and Serve
For best results, chill the cake in the refrigerator for at least 30 minutes before slicing and serving. This allows the frosting to set and makes for cleaner slices. Enjoy your magnificent Red Velvet Oreo Cake!
Tips & Variations
- Gluten-Free Option: Substitute the all-purpose flour with a 1:1 gluten-free baking flour blend. Ensure your Oreo cookies are also gluten-free (some brands offer this).
- Vegan/Vegetarian Option: For a vegan version, use a plant-based buttermilk substitute (almond milk + vinegar), flax eggs (1 tbsp ground flaxseed + 3 tbsp water per egg), vegan butter, and vegan cream cheese. Ensure your Oreos are certified vegan (most are, but check the label).
- Add a Boost of Protein: For a slightly healthier twist, you can mix 1-2 scoops of unflavored or vanilla protein powder into your cream cheese frosting. It won’t significantly alter the taste but will add a protein boost.
- Spicy Kick: For an intriguing flavor, add ¼ teaspoon of cayenne pepper to the dry ingredients for the cake layers. It won’t make the cake overtly spicy, but it will add a subtle warmth that enhances the cocoa flavor beautifully.
- Chocolate Lover’s Dream: Drizzle melted dark chocolate over the top of the frosted cake before adding the Oreo garnish. You can also add mini chocolate chips to the cake batter for extra chocolatey goodness.
Nutritional Information
Approximate values per serving (based on 12 servings):
- Calories: 580 kcal
- Protein: 7g
- Carbohydrates: 78g
- Fat: 30g
Note: These values are approximate and may vary depending on the specific brands and quantities of ingredients used.
Health Benefits
While this is an indulgent treat, some of its core ingredients offer nutritional value:
- Cocoa Powder: Even in small amounts, cocoa powder provides antioxidants called flavonoids. These compounds are known for their potential to help reduce inflammation and support heart health.
- Eggs: Eggs are a fantastic source of high-quality protein, essential for muscle repair and growth. They also contain important vitamins like B12 and D, and choline, which is crucial for brain health.
- Dairy (Buttermilk & Cream Cheese): Dairy products like buttermilk and cream cheese contribute calcium, which is vital for strong bones and teeth. They also provide protein and other essential vitamins like B2 and B5.
- Joy and Well-being: Sometimes, the greatest health benefit comes from the joy and satisfaction a delicious homemade treat brings. Sharing food with loved ones can boost mood and foster connection, which are important aspects of overall well-being.
Serving Suggestions
- Serve this cake as the star dessert at any gathering, from birthday parties to holiday celebrations.
- Pair a slice with a scoop of vanilla bean ice cream or a dollop of fresh whipped cream for an extra decadent treat.
- Enjoy with a hot cup of coffee, a glass of cold milk, or your favorite herbal tea for a delightful afternoon indulgence.
Storage Tips
Your Red Velvet Oreo Cake will keep beautifully in an airtight container in the refrigerator for up to 3-4 days. Because of the cream cheese frosting, it needs to be refrigerated. To freeze, slice the cake into individual servings and wrap each slice tightly in plastic wrap, then aluminum foil. It can be frozen for up to 1 month. Thaw frozen slices in the refrigerator overnight or at room temperature for a few hours. To reheat, it’s best enjoyed at room temperature, so simply let it sit out for 30-60 minutes before serving after refrigeration.
Conclusion
There you have it – a recipe for a show-stopping Red Velvet Oreo Cake that combines classic elegance with playful crunch. This cake is more than just a dessert; it’s a celebration of flavor, texture, and pure baking joy. Each bite offers the perfect balance of moist red velvet, subtle cocoa, tangy cream cheese, and irresistible Oreo pieces. It truly is a masterpiece you can create right in your own kitchen.
We encourage you to roll up your sleeves and give this recipe a try. You’ll find the process rewarding, and the results absolutely delicious. Don’t be afraid to personalize it with your own finishing touches or variations. Baking should be fun and creative!
Once your magnificent cake is complete, gather your loved ones and share the joy. There’s


