
Introduction
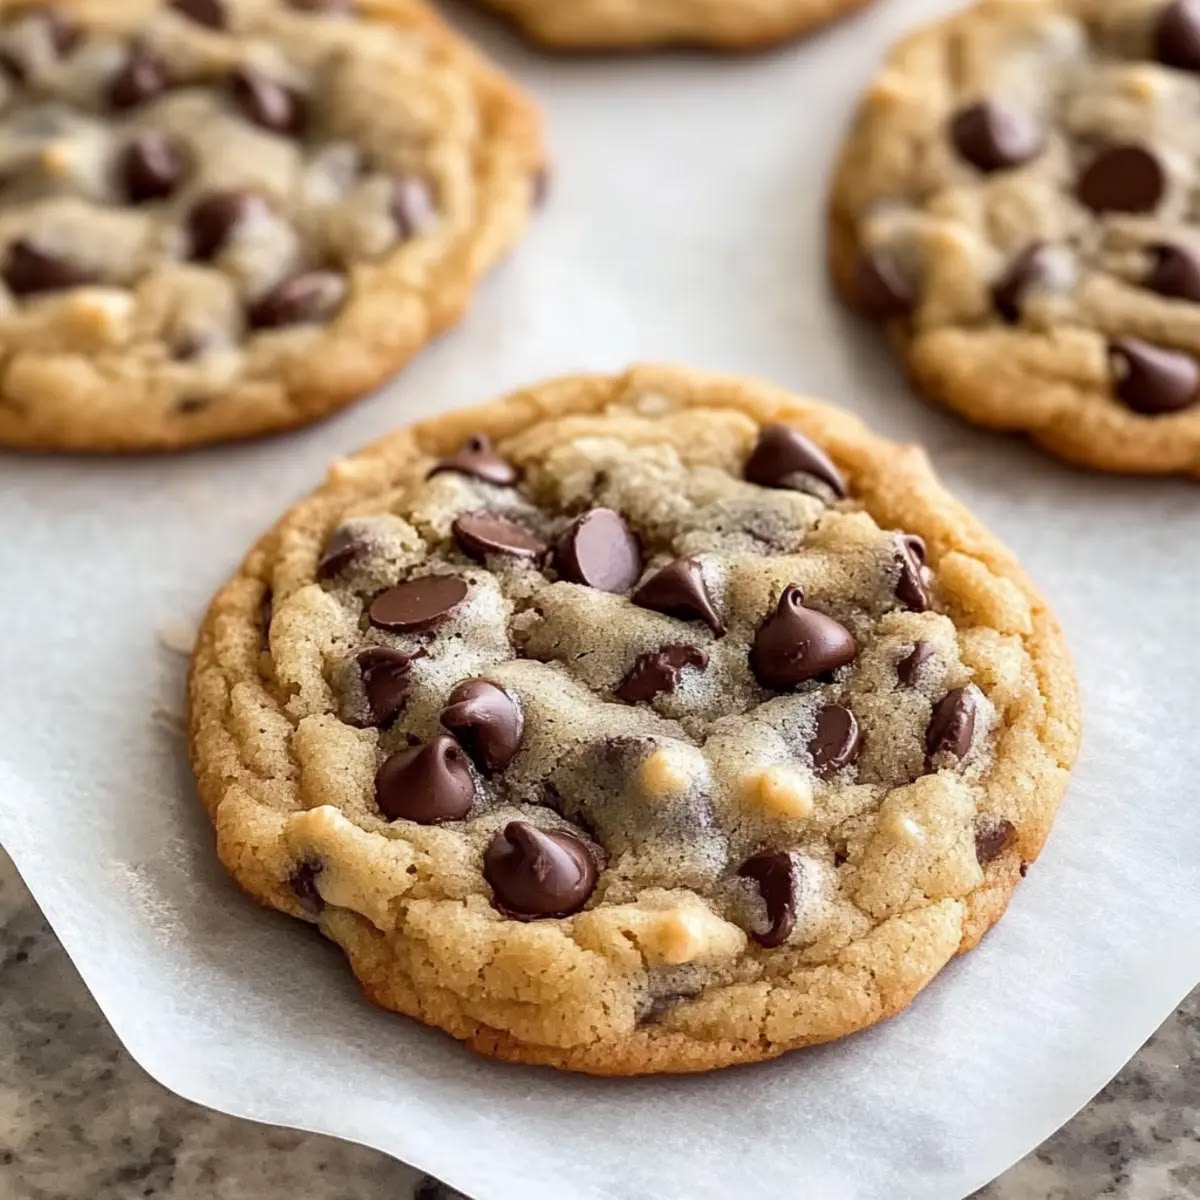
There’s nothing quite like a warm, gooey chocolate chip cookie straight from the oven. It’s a timeless classic, a hug in edible form, and a treat that brings smiles to faces of all ages. The rich, buttery dough studded with melting chocolate chips creates a symphony of textures and flavors that is simply irresistible. Every bite offers that perfect balance of sweet, salty, and utterly comforting.
You might think making such a perfect cookie is complicated, but I promise you it’s surprisingly easy! With simple ingredients you likely already have in your pantry, and straightforward steps, you can whip up a batch of these beauties in no time. Forget store-bought; homemade chocolate chip cookies are a game-changer, and the process itself is a joy.
So, are you ready to fill your home with the most incredible aroma and treat yourself to the ultimate comfort food? This recipe is designed for everyone, from beginner bakers to seasoned pros. Let’s get baking and create some delicious memories together!
Cooking Time & Prep Time
- Prep Time: 15 minutes
- Cooking Time: 10-12 minutes (per batch)
- Total Time: 25-30 minutes (active time, plus cooling)
Small tip: Reading through the entire recipe once before you start will help you get organized and make the process even smoother.
Ingredients
This recipe makes approximately 24 delicious cookies.
Dry Ingredients:
- 2 ¼ cups (270g) all-purpose flour
- 1 teaspoon baking soda
- ½ teaspoon salt
Wet Ingredients:
- 1 cup (226g) unsalted butter, softened to room temperature
- ¾ cup (150g) granulated sugar
- ¾ cup (160g) packed light brown sugar
- 2 large eggs
- 1 teaspoon pure vanilla extract
Mix-ins:
- 1 ½ cups (250g) semi-sweet chocolate chips (or a mix of your favorite chocolates!)
Step-by-Step Instructions
-
Step 1: Preheat Oven and Prepare Pan
Start by preheating your oven to 375°F (190°C). Line two baking sheets with parchment paper. This will prevent your cookies from sticking and ensure even baking.
Small tip: Parchment paper also makes cleanup a breeze!
-
Step 2: Whisk Dry Ingredients
In a medium bowl, whisk together the all-purpose flour, baking soda, and salt. Make sure these dry ingredients are well combined. Set this bowl aside for now.
Small tip: Whisking ensures that the leavening agent (baking soda) is evenly distributed throughout the flour.
-
Step 3: Cream Butter and Sugars
In a large bowl, using an electric mixer, cream together the softened butter, granulated sugar, and light brown sugar. Beat them on medium speed until the mixture is light and fluffy. This usually takes about 2-3 minutes.
Small tip: Softened butter is key here; it should be pliable but not melted, allowing it to incorporate air for fluffy cookies.
-
Step 4: Add Eggs and Vanilla
Beat in the eggs one at a time, mixing well after each addition. Then, stir in the vanilla extract. Continue mixing until everything is fully incorporated and smooth.
Small tip: Adding eggs one at a time helps them emulsify better with the butter mixture, creating a smoother dough.
-
Step 5: Combine Wet and Dry Ingredients
Gradually add the dry ingredient mixture to the wet ingredients. Mix on low speed until just combined. Be careful not to overmix the dough, as this can lead to tough cookies.
Small tip: Stop mixing as soon as you no longer see streaks of flour. A few lumps are perfectly fine!
-
Step 6: Fold in Chocolate Chips
Gently fold in the chocolate chips using a spatula or a wooden spoon. Distribute them evenly throughout the dough. You want every cookie to have plenty of chocolatey goodness.
Small tip: If you like a more rustic look, reserve a few chocolate chips to press onto the tops of the scooped dough balls before baking.
-
Step 7: Scoop and Bake
Drop rounded tablespoons of cookie dough onto the prepared baking sheets, leaving about 2 inches between each cookie. They will spread as they bake. Bake for 10-12 minutes, or until the edges are golden brown and the centers are still slightly soft.
Small tip: For perfectly round cookies, use a cookie scoop. Don’t overcrowd the baking sheet; bake in batches if necessary.
-
Step 8: Cool and Enjoy
Once baked, remove the cookies from the oven and let them cool on the baking sheets for 5 minutes. This allows them to set up without breaking. Then, transfer them to a wire rack to cool completely, or enjoy them warm!
Small tip: The cookies will continue to cook slightly on the hot baking sheet, so don’t worry if they seem a little underdone in the center when you pull them out.
Tips & Variations
- Gluten-Free Option: Simply substitute the all-purpose flour with an equal amount of a good quality 1:1 gluten-free baking flour blend. Ensure your blend contains xanthan gum for best results.
- Vegan Option: Replace the butter with a plant-based butter alternative (sticks work best). For the eggs, use two “flax eggs” (2 tablespoons ground flaxseed mixed with 6 tablespoons water, let sit for 5 minutes). And, of course, use your favorite vegan chocolate chips!
- Nutritional Boost: For a slightly healthier twist, try adding ½ cup of rolled oats to the dry ingredients, or a handful of chopped walnuts or pecans for extra fiber and healthy fats. You can also swap up to half of the all-purpose flour for whole wheat flour for more fiber.
- Spiced Version: For a delightful twist, add ½ teaspoon of ground cinnamon and a pinch of cayenne pepper to the dry ingredients. The subtle heat from the cayenne really enhances the chocolate flavor!
- Flavor Twist: Experiment with different types of chocolate! Use milk chocolate, dark chocolate, white chocolate, or even butterscotch chips. A sprinkle of sea salt flakes on top of the warm cookies after baking also elevates the flavor beautifully.
Nutritional Information
Approximate values per serving (based on 24 servings):
- Calories: 180 kcal
- Protein: 2.5 g
- Carbohydrates: 25 g
- Fat: 9 g
Please note that these values are approximate and may vary depending on the specific brands and exact amounts of ingredients used.
Health Benefits
While chocolate chip cookies are definitely a treat, some of their key ingredients do offer a few benefits!
Dark chocolate, especially varieties with a high cocoa content, is packed with antioxidants called flavonoids. These compounds can help fight free radicals in your body and may contribute to heart health. Plus, chocolate is known to boost mood, thanks to compounds like phenylethylamine!
Eggs are a fantastic source of high-quality protein, which is essential for muscle repair and growth. They also contain important vitamins and minerals, including Vitamin D, B vitamins, and choline, which supports brain health.
Butter, in moderation, provides fat-soluble vitamins like Vitamin A, D, E, and K. These vitamins are crucial for various bodily functions, including vision, bone health, and immune function.
When considering variations, adding ingredients like oats can boost your fiber intake, aiding digestion and promoting a feeling of fullness. Nuts also provide healthy fats, protein, and various micronutrients like magnesium and zinc.
Serving Suggestions
- Serve warm with a tall glass of cold milk for the ultimate classic combination.
- Enjoy alongside a scoop of vanilla bean ice cream or a drizzle of caramel sauce for an elevated dessert experience.
- Crumble over yogurt or oatmeal for a decadent breakfast treat, or pack them in lunchboxes for a delightful surprise.
- Meal Prep Idea: You can prepare the cookie dough ahead of time and store it in the refrigerator for up to 3 days. For even quicker baking later, scoop the dough into balls and freeze them on a baking sheet. Once solid, transfer to a freezer-safe bag and bake from frozen, adding a couple of extra minutes to the baking time.
Storage Tips
Store your freshly baked chocolate chip cookies in an airtight container at room temperature for up to 3-5 days. To keep them soft, you can place a slice of bread in the container with them. Baked cookies also freeze beautifully; simply place them in a freezer-safe bag or container for up to 3 months. When you’re ready to enjoy, let them thaw at room temperature, or warm them gently in the microwave for a few seconds for that fresh-baked feel.
Conclusion
There you have it – the recipe for truly spectacular chocolate chip cookies! This recipe proves that the best things in life are often the simplest. With their chewy centers, slightly crispy edges, and pockets of melted chocolate, these cookies are pure joy in every bite. They are the perfect treat for any occasion, from a quiet evening at home to a bustling party.
Don’t hesitate to give this recipe a try. The aroma alone as they bake will make your kitchen feel like the warmest, most inviting place on earth. Baking is a wonderful way to express creativity and share love, and these cookies are sure to be a hit with everyone who tries them.
So, gather your ingredients, put on your apron, and get ready to create some magic. Bake a batch, share them with family and friends, and watch the smiles appear. Happy baking!


