
Introduction
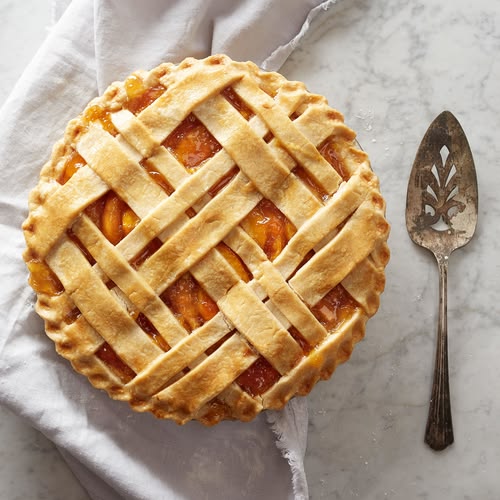
There’s nothing quite like a homemade pie, and the secret to its success often lies in its foundation: the crust! Our homemade pie crust recipe is a game-changer. It’s wonderfully flaky, incredibly tender, and has that perfect buttery flavor that store-bought crusts can only dream of. It truly elevates any pie, sweet or savory, making it extra special.
You might think making pie crust from scratch is difficult, but I promise it’s surprisingly easy and quick to master. With just a few basic ingredients and simple techniques, you’ll be creating beautiful, delicious crusts in no time. The key is using cold ingredients and not overworking the dough. It’s a very forgiving process once you get the hang of it!
So, get ready to impress yourself, your family, and your friends. This recipe will give you the confidence to tackle any pie challenge. Let’s dive in and create the most amazing homemade pie crust you’ve ever tasted. You’re going to love it!
Cooking Time & Prep Time
- Prep Time: 20 minutes (active time)
- Chilling Time: 60 minutes (minimum)
- Baking Time (Blind Bake): 15-20 minutes
- Total Time: Approximately 1 hour 35 minutes (including chilling and blind baking)
Small tip: The chilling time is crucial for a flaky crust, so don’t skip it! It helps the butter firm up and prevents the dough from shrinking during baking.
Ingredients
This recipe makes enough for one 9-inch double-crust pie or two single 9-inch pie crusts.
- 2 ½ cups (300g) all-purpose flour, plus more for dusting
- 1 teaspoon fine sea salt
- 1 cup (226g) unsalted butter, very cold and cut into ½-inch cubes
- ½ cup (120ml) ice water, plus 1-2 tablespoons more if needed
Step-by-Step Instructions
Step 1: Combine Dry Ingredients
In a large mixing bowl, whisk together the all-purpose flour and the salt. Make sure they are well combined. This step ensures an even distribution of salt throughout your crust, which enhances the flavor.
Small tip: Sifting your flour before measuring can help ensure a lighter crust, but it’s not strictly necessary.
Step 2: Cut in Cold Butter
Add the very cold, cubed butter to the flour mixture. Using a pastry blender, two knives, or your fingertips, cut the butter into the flour until the mixture resembles coarse meal with some pea-sized pieces of butter still visible. These butter pieces are what create the flaky layers in your crust!
Small tip: Work quickly to keep the butter as cold as possible. If the butter gets too warm, your crust won’t be as flaky.
Step 3: Add Ice Water Gradually
Pour in ½ cup of ice water, one tablespoon at a time, mixing gently with a fork after each addition. The goal is to bring the dough together just enough. You might not need all the water, or you might need a tiny bit more.
Small tip: Use water with actual ice in it. The colder the water, the better for the dough’s texture. Only add enough water for the dough to just come together.
Step 4: Form the Dough
Once the dough barely holds together, turn it out onto a lightly floured surface. Gently gather it into a ball, then divide it in half if making two single crusts. Flatten each half into a disc. Wrap each disc tightly in plastic wrap.
Small tip: Avoid overworking the dough. Too much kneading develops gluten, which can make your crust tough instead of tender.
Step 5: Chill the Dough
Place the wrapped dough discs in the refrigerator for at least 60 minutes. Chilling allows the gluten to relax and the butter to firm up again. This makes the dough easier to roll out and contributes to a flakier texture.
Small tip: You can chill the dough for up to 2 days, or even freeze it for several months! Just thaw in the fridge before use.
Step 6: Roll Out the Dough
On a lightly floured surface, unwrap one disc of dough. Roll it out from the center outwards into a 12-inch circle, about ⅛-inch thick. Lift and rotate the dough frequently to prevent sticking, adding more flour underneath if necessary.
Small tip: If the dough starts to crack at the edges, gently pinch it back together or let it sit for a few minutes to warm up slightly.
Step 7: Transfer to Pie Plate
Carefully transfer the rolled-out dough to a 9-inch pie plate. You can do this by gently rolling it around your rolling pin and unrolling it over the plate, or by folding it into quarters and unfolding it in the plate. Center it well.
Step 8: Flute the Edges
Trim the excess dough, leaving about a ½-inch overhang. Fold this overhang under itself, creating a neat edge. Then, use your fingers to crimp or flute the edges decoratively. This not only looks nice but also helps hold the crust’s shape.
Step 9: Blind Bake (Optional, but Recommended for Wet Fillings)
For a blind-baked crust (par-baked or fully baked before adding filling), prick the bottom of the crust all over with a fork. Line the crust with parchment paper and fill with pie weights or dried beans. Bake in a preheated oven at 375°F (190°C) for 15 minutes. Remove weights and parchment, then bake for another 5-10 minutes until lightly golden. Let cool completely before filling.
Small tip: Blind baking prevents a soggy bottom crust, especially for custard or fruit pies with high moisture content.
Tips & Variations
- Gluten-Free Option: Substitute the all-purpose flour with an equal amount (by weight, usually 300g) of a good quality gluten-free all-purpose flour blend that contains xanthan gum. You might need slightly more or less ice water to achieve the right consistency.
- Vegan or Vegetarian Option: Replace the unsalted butter with a high-quality, solid vegan butter alternative or vegetable shortening. Ensure it is very cold for best results.
- Savory Crust for Hearty Fillings: For quiches or pot pies, add 1 teaspoon of dried herbs (like thyme, rosemary, or sage) and ½ teaspoon of garlic powder to the dry ingredients in Step 1. You can also add a pinch of black pepper.
- Spicy Version: Incorporate ¼ to ½ teaspoon of cayenne pepper or smoked paprika into the flour mixture for a subtle kick. This is fantastic for savory pies or empanadas.
- Sweet Crust: For dessert pies, add 1-2 tablespoons of granulated sugar to the dry ingredients along with the flour and salt. This gives the crust a lovely hint of sweetness and helps with browning.
- Using Shortening: For an even flakier, though less buttery, crust, you can use half butter and half vegetable shortening. Shortening has a higher melting point, creating larger pockets of steam and thus more pronounced flakiness.
Nutritional Information
Approximate values per serving (based on 12 servings for a double-crust pie):
- Calories: 250 kcal
- Protein: 3g
- Carbohydrates: 25g
- Fat: 16g
Please note that these values are approximate and may vary depending on the specific brands and exact amounts of ingredients used.
Health Benefits
While pie crust is often seen as an indulgence, making it at home offers some benefits over store-bought options. You control the quality of ingredients, avoiding artificial additives and preservatives.
- Energy Source: The primary ingredient, all-purpose flour, provides carbohydrates, which are the body’s main source of energy. This fuels your muscles and brain.
- Healthy Fats (in moderation): Butter, when consumed in moderation, offers fat-soluble vitamins like Vitamin A, D, E, and K2. These vitamins are essential for vision, bone health, immune function, and blood clotting.
- Mineral Content: Flour contains small amounts of minerals like iron and B vitamins (thiamine, niacin, riboflavin), especially if using enriched flour. Salt, while used sparingly, is vital for nerve function and fluid balance.
- Control Over Ingredients: Making your own crust means you can choose high-quality butter and flour, avoiding trans fats or hydrogenated oils often found in commercial products. This gives you peace of mind about what you’re eating.
Serving Suggestions
- Sweet Pies: This crust is perfect for classic fruit pies like apple, cherry, or peach. It also works beautifully for creamy custard pies such as pumpkin pie, pecan pie, or chocolate silk pie.
- Savory Delights: Use it as the base for a hearty quiche filled with eggs, cheese, and vegetables. It’s also ideal for savory pot pies, chicken and mushroom pies, or even mini hand pies filled with spiced meat.
- Main or Side: When filled, this crust becomes the star of a main dish pie. Small tarts or individual hand pies made with this crust can also serve as a delicious side dish or appetizer.
- Meal Prep Ideas: Prepare several batches of dough discs and freeze them! Wrap them tightly in plastic wrap and then aluminum foil. Thaw them in the refrigerator overnight before you plan to bake. This makes pie making incredibly convenient.
Storage Tips
Unbaked pie dough can be stored in the refrigerator, tightly wrapped, for up to 2 days. For longer storage, you can freeze the wrapped dough discs for up to 3 months. Thaw frozen dough in the refrigerator overnight before rolling. Baked pie crusts (blind-baked) can be stored at room temperature for 1-2 days, or in the refrigerator for up to 3 days. To reheat a blind-baked crust, place it in a 350°F (175°C) oven for 5-10 minutes until crisp again.
Conclusion
You’ve just learned how to make an incredible homemade pie crust! It’s the kind of recipe that will make you feel like a true baking superstar. This crust is wonderfully versatile, providing the perfect flaky, buttery foundation for any pie you dream of creating, whether it’s a sweet dessert or a savory dinner centerpiece.
Don’t be afraid to get your hands a little messy and give this recipe a try. The simple steps and helpful tips will guide you to success. Once you taste the difference that a homemade crust makes, you’ll never go back to store-bought again. The satisfaction of pulling a beautiful, golden-brown pie from the oven, knowing you made the crust yourself, is truly unmatched.
So go ahead, bake up a storm, and share your delicious creations with family and friends. There’s nothing quite like the joy of sharing homemade goodness. Happy baking!


