
Introduction
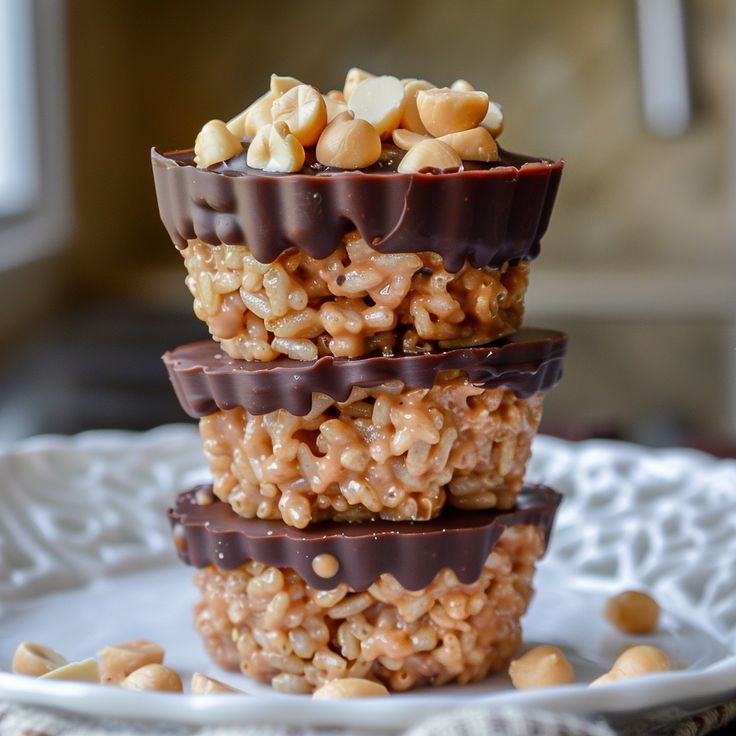
Get ready for a treat that brings pure joy with every bite! Our Chocolate Peanut Butter Rice Krispie Cups are a delightful fusion of classic flavors and irresistible textures. Imagine a crunchy rice krispie base, topped with a creamy, dreamy peanut butter filling, all crowned with a luscious layer of rich chocolate. It’s a symphony of sweet and savory that will make your taste buds sing!
The best part? This recipe is incredibly easy to make and requires absolutely no baking. That’s right, no oven needed! With simple ingredients and straightforward steps, you can whip up these delicious cups in no time. They are perfect for a quick dessert, a delightful snack, or a crowd-pleasing party treat.
So, if you’re looking for a fuss-free dessert that delivers big on flavor, you’ve come to the right place. These Chocolate Peanut Butter Rice Krispie Cups are guaranteed to become a new favorite in your home. Let’s dive in and create some magic!
Cooking Time & Prep Time
- Prep Time: 25 minutes
- Chill Time: 60 minutes (or until firm)
- Total Time: 1 hour 25 minutes
Small tip: Gathering all your ingredients and measuring them out before you start will make the entire process much smoother and quicker!
Ingredients
This recipe makes approximately 12 delightful cups.
-
For the Rice Krispie Base:
- 3 tablespoons unsalted butter (or vegan butter)
- 10 ounces mini marshmallows (about 6 cups)
- 6 cups Rice Krispies cereal (or crispy rice cereal)
-
For the Peanut Butter Layer:
- 1 cup creamy peanut butter
- 1/2 cup powdered sugar
- 1/4 cup unsalted butter, softened (or vegan butter)
- 1 teaspoon vanilla extract
-
For the Chocolate Topping:
- 1 1/2 cups chocolate chips (semi-sweet or milk chocolate)
- 2 tablespoons coconut oil (or unsalted butter)
Step-by-Step Instructions
-
Prepare Your Muffin Tin
Line a 12-cup standard muffin tin with paper liners. This will make it super easy to remove your finished cups without any sticking. A little spray of non-stick cooking spray inside the liners can also help if you’re extra cautious.
Small tip: If you don’t have paper liners, you can lightly grease the muffin tin cups directly, but liners are highly recommended for easy handling.
-
Make the Rice Krispie Base
In a large microwave-safe bowl, melt the 3 tablespoons of butter. Add the marshmallows and microwave for 1-2 minutes, stirring halfway through, until they are puffed and melted. Stir until smooth. Alternatively, melt butter and marshmallows in a large pot over low heat on the stovetop.
Small tip: Don’t overheat the marshmallows, as this can make them hard. Stirring well is key to a smooth mixture.
-
Combine and Press the Krispie Base
Quickly add the 6 cups of Rice Krispies cereal to the melted marshmallow mixture. Stir until the cereal is evenly coated. Divide the mixture evenly among the 12 prepared muffin cups and gently press it down to form a firm base. You can use the back of a spoon or lightly greased fingers.
Small tip: Work quickly here! The marshmallow mixture sets fast. Lightly grease your spoon or fingers to prevent sticking.
-
Prepare the Peanut Butter Layer
In a medium bowl, combine the 1 cup of creamy peanut butter, 1/2 cup of powdered sugar, 1/4 cup of softened butter, and 1 teaspoon of vanilla extract. Beat with an electric mixer or stir vigorously with a spoon until the mixture is smooth and creamy. It should be thick but spreadable.
Small tip: Ensure your butter is truly softened to room temperature for the creamiest peanut butter layer. This makes it much easier to mix.
-
Add the Peanut Butter Layer
Spoon the peanut butter mixture evenly over the Rice Krispie bases in each muffin cup. Gently spread it out to create a smooth, even layer. You want a nice thick layer of peanut buttery goodness.
Small tip: Use an offset spatula or the back of a small spoon to spread the peanut butter layer neatly.
-
Chill the First Layers
Place the muffin tin into the refrigerator for at least 15-20 minutes. This chilling time helps the peanut butter layer set, making it firm enough to hold up when you add the chocolate topping. Don’t skip this step!
Small tip: A quick chill ensures crisp layers and prevents the chocolate from melting the peanut butter.
-
Prepare the Chocolate Topping
In another microwave-safe bowl, combine the 1 1/2 cups of chocolate chips and 2 tablespoons of coconut oil. Microwave in 30-second intervals, stirring well after each, until the chocolate is completely melted and smooth. The coconut oil helps create a silky, pourable chocolate that sets beautifully.
Small tip: If you don’t have coconut oil, use butter. Stirring frequently prevents the chocolate from burning.
-
Pour the Chocolate Topping
Remove the muffin tin from the refrigerator. Carefully pour the melted chocolate evenly over the peanut butter layer in each cup. You can gently tap the muffin tin on the counter a few times to help the chocolate settle and create a smooth surface.
Small tip: For an extra touch, sprinkle a tiny pinch of sea salt flakes over the still-wet chocolate for a delightful sweet and salty contrast.
-
Final Chill and Set
Return the muffin tin to the refrigerator for at least 45 minutes, or until the chocolate layer is completely set and firm to the touch. This final chill is crucial for the cups to hold their shape and be easy to remove.
Small tip: Patience is a virtue! A fully chilled cup will be much easier to handle and enjoy.
-
Remove and Serve
Once fully set, carefully remove the cups from the muffin tin by lifting the paper liners. Serve them chilled or let them sit at room temperature for a few minutes to slightly soften before enjoying. Prepare for smiles!
Small tip: If you’re having trouble removing them, a quick twist of the liner helps.
Tips & Variations
- Gluten-Free Option: Ensure you use certified gluten-free crispy rice cereal, as not all brands are. All other ingredients are typically naturally gluten-free.
- Vegan/Vegetarian Option: Use vegan marshmallows, vegan butter, and dairy-free chocolate chips. This recipe is easily adaptable for a delicious plant-based treat!
- Protein Power-Up: Stir a tablespoon or two of your favorite vanilla or unflavored protein powder into the peanut butter layer. You might need to add a tiny splash of plant milk to maintain consistency. You can also mix in chia seeds or ground flax seeds to the peanut butter for an extra boost of fiber and omega-3s.
- Spicy Kick: For those who love a bit of heat, add a tiny pinch (about 1/8 teaspoon) of cayenne pepper to the melted chocolate. It creates an unexpected and delicious warmth that complements the sweetness.
- Flavor Fun: Experiment with different nut butters like almond or cashew butter. You can also use white chocolate for the topping, or mix in mini chocolate chips or sprinkles into the peanut butter layer for added texture and fun!
Nutritional Information
Approximate values per serving (based on 12 servings):
- Calories: 350-400 kcal
- Protein: 7-9 g
- Carbohydrates: 35-40 g
- Fat: 20-25 g
Note: Nutritional values may vary depending on specific brands and exact amounts of ingredients used. This is an estimate for guidance.
Health Benefits
While these are a treat, some of the main ingredients do offer delightful benefits!
- Peanut Butter Power: Peanut butter is a fantastic source of plant-based protein, which is essential for building and repairing tissues. It also provides healthy monounsaturated and polyunsaturated fats, which are good for heart health. Plus, it’s packed with vitamins and minerals like magnesium, potassium, and Vitamin E.
- Chocolate Goodness: Dark chocolate, especially, is rich in antioxidants called flavonoids. These compounds can help protect your cells from damage and may contribute to improved mood. Even milk chocolate offers a moment of joy and comfort!
- Energy Boost: Rice Krispies cereal provides simple carbohydrates, offering a quick and easily digestible source of energy. This can be great for a pick-me-up or a pre-workout snack in moderation.
- Fiber Facts: Peanut butter also contributes dietary fiber, which is important for digestive health and can help you feel fuller for longer.
Serving Suggestions
- Perfect Party Treat: These cups are ideal for potlucks, birthday parties, or any gathering. They are easy to transport and require no utensils!
- Afternoon Pick-Me-Up: Enjoy one with a cup of coffee or tea for a delightful mid-day break.
- Dessert Delight: Serve them as a simple yet satisfying dessert after dinner. They’re a crowd-pleaser for all ages.
- Grab-and-Go Snack: Keep a batch in the fridge for a convenient, pre-portioned snack whenever a sweet craving hits.
Storage Tips
These Chocolate Peanut Butter Rice Krispie Cups keep wonderfully. Store them in an airtight container in the refrigerator for up to 5-7 days. They can also be frozen for longer storage; place them in a single layer in an airtight container, separated by parchment paper, for up to 2-3 months. Thaw them in the refrigerator or at room temperature for about 15-20 minutes before enjoying. No reheating is necessary; they are best served chilled or at room temperature.
Conclusion
And there you have it – a recipe for pure happiness in a cup! These Chocolate Peanut Butter Rice Krispie Cups truly are a marvel of no-bake desserts. They combine the perfect crunch, the creamiest peanut butter, and a decadent chocolate finish, making them utterly irresistible. They’re proof that sometimes, the simplest treats are the most satisfying.
Whether you’re a seasoned baker or just starting your culinary journey, this recipe is incredibly forgiving and yields fantastic results every time. So go ahead, gather your ingredients, and treat yourself (and your loved ones!) to this sweet and crunchy delight. You deserve a little moment of pure, unadulterated joy.
Don’t forget to share your creations with us! We love seeing your delicious masterpieces. Enjoy every single bite of these amazing Chocolate Peanut Butter Rice Krispie Cups, and spread the sweet joy with family and friends.


