
Introduction
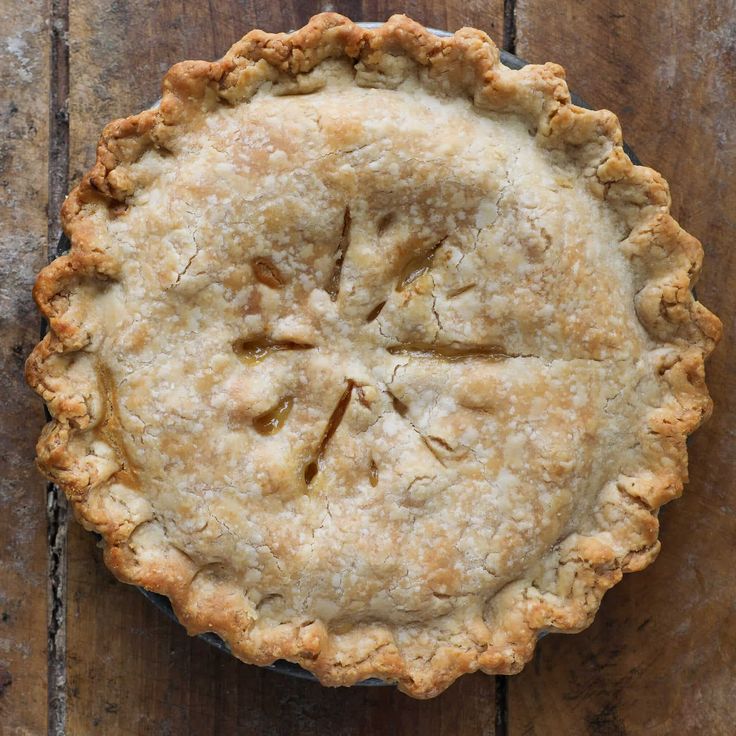
Welcome, fellow bakers! Today, we’re diving into a true kitchen classic: the Crisco Pie Crust. This isn’t just any pie crust; it’s the foundation for countless delicious memories. Imagine a crust so flaky, so tender, it practically melts in your mouth. That’s exactly what you’ll get with this reliable recipe. It’s the secret to perfect pies, quiches, and tarts every single time.
You might think making pie crust from scratch is daunting, but I promise you, it’s surprisingly easy and quick. With just a few simple ingredients and a straightforward technique, you’ll be a pie crust pro in no time. Crisco, the star ingredient, ensures a consistently tender and light texture that’s hard to beat. Forget tough, crumbly crusts – this recipe is foolproof and delivers beautiful results.
So, roll up your sleeves and get ready to create something truly special. Whether you’re a seasoned baker or just starting your culinary journey, this Crisco Pie Crust recipe will become your go-to. Give it a try, and prepare to impress yourself and everyone lucky enough to taste your creations!
Cooking Time & Prep Time
- Prep Time: 20 minutes
- Chilling Time: 30 minutes (minimum)
- Blind Baking Time: 15-20 minutes (if pre-baking)
- Total Time: Approximately 65-70 minutes (including chilling)
Small tip: Don’t rush the chilling process. A well-chilled dough is much easier to roll out and helps prevent shrinkage during baking.
Ingredients
This recipe makes one double-crust 9-inch pie or two single-crust 9-inch pies.
- 2 ½ cups (300g) all-purpose flour, plus more for dusting
- 1 teaspoon salt
- 1 cup (226g) cold Crisco all-vegetable shortening, cut into ½-inch cubes
- ½ cup (120ml) ice water, plus 1-2 tablespoons more if needed
Step-by-Step Instructions
Step 1: Combine Dry Ingredients
In a large mixing bowl, whisk together the all-purpose flour and salt. Make sure they are thoroughly combined. This ensures an even distribution of flavor throughout your crust.
Small tip: Use a whisk to really aerate the flour and salt. This helps create a lighter crust.
Step 2: Cut in the Crisco
Add the cold, cubed Crisco shortening to the flour mixture. Using a pastry blender, two knives, or your fingertips, cut the shortening into the flour until the mixture resembles coarse crumbs with some pea-sized pieces of Crisco remaining. Avoid overworking the mixture at this stage.
Small tip: Keep your hands cool if using your fingertips. The colder the Crisco, the flakier your crust will be.
Step 3: Add Ice Water Gradually
Pour in ½ cup of ice water, one tablespoon at a time, mixing gently with a fork after each addition. Continue to mix until the dough just begins to come together. You might need an extra tablespoon or two of water, but be careful not to add too much.
Small tip: Use actual ice water! The colder the water, the less gluten develops, leading to a tender crust.
Step 4: Form the Dough
Once the dough just holds together, turn it out onto a lightly floured surface. Gently gather the dough and divide it in half. Form each half into a flat disk. Do not knead the dough excessively, as this can make it tough.
Small tip: Handle the dough as little as possible. Overworking the dough develops gluten, which can lead to a tough crust.
Step 5: Chill the Dough
Wrap each dough disk tightly in plastic wrap. Refrigerate for at least 30 minutes, or up to 2 days. Chilling the dough allows the gluten to relax and the Crisco to firm up, making it easier to roll and preventing shrinkage.
Small tip: If you’re in a hurry, you can place the dough in the freezer for 15-20 minutes, but keep a close eye on it.
Step 6: Roll Out the Dough
When ready to bake, remove one disk of dough from the refrigerator. On a lightly floured surface, roll out the dough from the center outwards into a 12-inch circle, about ⅛-inch thick. Lift and rotate the dough frequently to prevent sticking and to ensure an even thickness.
Small tip: If the dough cracks at the edges, gently push it back together with your fingers.
Step 7: Transfer to Pie Plate
Carefully transfer the rolled-out dough to a 9-inch pie plate. You can do this by gently folding the dough in half or quarters, or by rolling it loosely around your rolling pin and unrolling it over the plate. Center the dough in the plate.
Small tip: Don’t stretch the dough when placing it in the pie plate, as this can cause it to shrink during baking.
Step 8: Trim and Flute Edges
Trim the edges of the dough to about a ½-inch overhang. Fold the overhang under itself, then crimp or flute the edges decoratively. If making a double-crust pie, repeat steps 6-8 for the second dough disk, then add your filling before topping with the second crust.
Small tip: For a beautiful edge, use the tines of a fork to create a simple pattern, or use your thumb and forefinger to create a classic fluted edge.
Step 9: Blind Bake (Optional)
If your recipe calls for a pre-baked crust (blind baking), prick the bottom and sides of the dough with a fork. Line the crust with parchment paper and fill with pie weights or dried beans. Bake at 400°F (200°C) for 15-20 minutes, or until lightly golden. Remove weights and paper, then continue baking for 5-10 minutes if needed, until fully cooked through.
Small tip: Pricking the dough prevents large air bubbles from forming and ensures an even bake.
Tips & Variations
- Gluten-Free Option: Substitute the all-purpose flour with a 1:1 gluten-free baking flour blend. Look for blends that contain xanthan gum for best results.
- Vegan/Vegetarian Option: Good news! Crisco all-vegetable shortening is already vegan, making this pie crust inherently vegan and vegetarian-friendly.
- Savory Crust for Meals: Use this versatile crust to create hearty savory pies like chicken pot pie, beef and vegetable pie, or a delicious quiche filled with your favorite vegetables and cheese.
- Spicy Kick: For a savory pie crust with a bit of a kick, add ¼ teaspoon of cayenne pepper or ½ teaspoon of freshly ground black pepper to the dry ingredients in Step 1.
- Sweeter Crust: If you’re making a sweet pie and prefer a slightly sweeter crust, add 1-2 tablespoons of granulated sugar to the dry ingredients in Step 1.
- Half-and-Half for Flavor: For a richer flavor while maintaining flakiness, try using half butter and half Crisco. Cut in 1/2 cup cold butter cubes along with 1/2 cup cold Crisco.
Nutritional Information
Approximate values per serving (based on 8 servings for one 9-inch pie crust):
- Calories: 290 kcal
- Protein: 4g
- Carbohydrates: 30g
- Fat: 17g
Note: These values are approximate and may vary depending on specific ingredients used and portion sizes.
Health Benefits
While a Crisco pie crust is often enjoyed as a delightful treat, it offers some interesting points to consider, especially when made from scratch.
Making your own pie crust gives you complete control over the ingredients. Unlike many store-bought options that can contain preservatives or artificial flavors, your homemade crust is fresh and free from unwanted additives. This allows you to know exactly what you’re putting into your body.
The flour in the crust provides carbohydrates, which are our body’s primary source of energy. While this recipe uses all-purpose flour, you could experiment with a portion of whole wheat flour for added dietary fiber, which aids in digestion and can contribute to a feeling of fullness.
Baking itself can be a wonderfully therapeutic and rewarding activity. The process of creating something delicious from scratch, especially a classic like pie crust, can boost mood and provide a sense of accomplishment. Sharing your homemade treats also fosters connections and brings joy to others.
Ultimately, enjoying a slice of homemade pie, with its tender, flaky crust, is about savoring a moment of pleasure and comfort. When consumed as part of a balanced diet, these occasional indulgences contribute to overall well-being and happiness.
Serving Suggestions
- Sweet Delights: This crust is perfect for classic fruit pies like apple, cherry, peach, or berry. It also makes an incredible base for creamy pumpkin, pecan, or chocolate silk pies.
- Savory Sensations: Use it for savory dishes such as a hearty chicken pot pie, a rich beef and mushroom pie, or a vibrant quiche filled with spinach, feta, and sun-dried tomatoes.
- Individual Servings: Roll out the dough and cut it into smaller circles to make individual hand pies or mini quiches, perfect for parties or lunchboxes.
Storage Tips
Unbaked pie dough can be stored tightly wrapped in plastic in the refrigerator for up to 2 days. For longer storage, you can freeze the wrapped dough for up to 3 months. Thaw frozen dough overnight in the refrigerator before rolling. An unbaked pie crust in its pie plate can also be frozen, well-wrapped, for up to 1 month. Baked pie crusts, blind-baked or filled, should be covered loosely and can last 2-3 days at room temperature (depending on filling) or up to 5 days in the refrigerator. To reheat a pie with this crust, warm in a preheated oven at 350°F (175°C) for 15-20 minutes, or until heated through and the crust is crisp again.
Conclusion
There you have it – the ultimate guide to making a perfect Crisco Pie Crust! This recipe truly is a game-changer for anyone looking to achieve that coveted flaky, tender texture. It’s incredibly versatile, serving as the ideal foundation for both sweet dessert pies and savory main course tarts. Once you master this crust, a world of baking possibilities opens up before you.
Don’t be intimidated by the idea of homemade pie crust. This recipe is designed to be simple and forgiving, even for beginners. The joy of creating something so delicious from scratch is incredibly rewarding. So, gather your ingredients, follow these steps, and prepare


