
Introduction
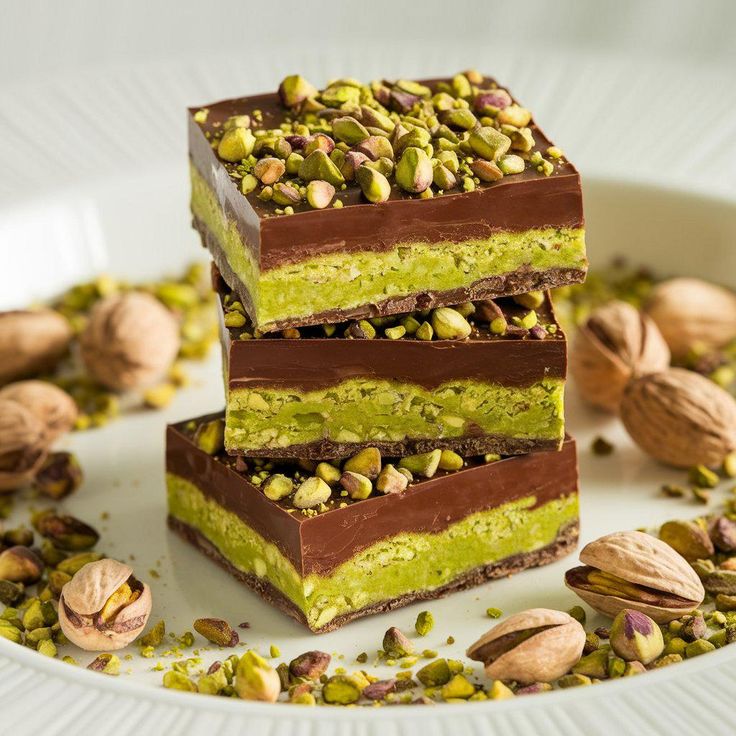
Get ready to create something truly magical in your kitchen today! We’re diving into the world of “Delicious Dubai Chocolate Twix Bars.” Imagine a buttery shortbread base, topped with a luscious, chewy caramel, all enrobed in a generous layer of rich, smooth chocolate. These bars capture the essence of luxury and indulgence, reminiscent of the exquisite treats found in high-end chocolate shops in Dubai, but made right in your home.
You might think making such a decadent treat is complicated, but I promise you, it’s surprisingly simple! This recipe breaks down the process into easy-to-follow steps, using common ingredients you likely already have. The most challenging part will be waiting for them to chill and set, but trust me, the wait is absolutely worth it for these irresistible bites of heaven.
So, clear your counter, gather your ingredients, and prepare for an incredibly rewarding baking adventure. These Dubai Chocolate Twix Bars are perfect for impressing guests, delighting your family, or simply treating yourself to a moment of pure bliss. Let’s get started and bring a taste of luxury into your everyday!
Cooking Time & Prep Time
- Prep Time: 40 minutes
- Cooking Time: 25 minutes (for shortbread)
- Chilling Time: 2-3 hours (essential for setting)
- Total Active Time: 65 minutes
Small tip: To make your prep even smoother, measure out all your ingredients before you start. This is called “mise en place” and it helps prevent any last-minute scrambling!
Ingredients
This recipe makes approximately 16 delicious bars.
For the Shortbread Base:
- 1 cup (2 sticks / 226g) unsalted butter, softened
- 1/2 cup (100g) granulated sugar
- 2 cups (240g) all-purpose flour
- 1/4 teaspoon salt
- 1 teaspoon vanilla extract
For the Caramel Layer:
- 1/2 cup (1 stick / 113g) unsalted butter
- 1/2 cup (100g) packed light brown sugar
- 1 (14-ounce / 397g) can sweetened condensed milk
- 2 tablespoons golden syrup or light corn syrup
- 1/4 teaspoon salt
- 1 teaspoon vanilla extract
For the Chocolate Coating:
- 18 ounces (about 510g) good quality milk chocolate or dark chocolate, chopped
- 1 tablespoon coconut oil (optional, for extra shine and smoothness)
Step-by-Step Instructions
-
Step 1: Prepare Your Baking Pan
Preheat your oven to 350°F (175°C). Line a 9×13 inch baking pan with parchment paper, leaving an overhang on the sides. This overhang will help you lift the bars out easily later. Make sure the parchment paper covers the bottom and goes up the sides of the pan.
Small tip: Crinkle the parchment paper slightly before pressing it into the pan. This makes it easier to fit into the corners.
-
Step 2: Make the Shortbread Dough
In a large bowl, cream together the softened butter and granulated sugar until light and fluffy. Use an electric mixer for best results. Beat in the vanilla extract. Gradually add the flour and salt, mixing on low speed until just combined and a soft dough forms. Do not overmix.
-
Step 3: Bake the Shortbread Base
Press the shortbread dough evenly into the bottom of your prepared 9×13 inch pan. Use the back of a spoon or your fingers to get a smooth, even layer. Bake for 20-25 minutes, or until the edges are lightly golden. The center should look set but still pale.
Small tip: For a perfectly even base, place another piece of parchment paper on top of the dough and use a flat bottomed glass to press it down.
-
Step 4: Cool the Shortbread
Once baked, remove the shortbread from the oven and let it cool completely in the pan on a wire rack. It needs to be fully cooled before you add the caramel layer. This prevents the caramel from melting the shortbread.
-
Step 5: Prepare the Caramel Layer
While the shortbread cools, combine the butter, brown sugar, sweetened condensed milk, golden syrup (or corn syrup), and salt in a medium saucepan. Cook over medium heat, stirring constantly, until the mixture comes to a boil. Reduce the heat to low and continue to cook, stirring frequently, for 5-7 minutes, or until the caramel thickens and turns a beautiful golden brown. Remove from heat and stir in the vanilla extract.
Small tip: Keep stirring the caramel constantly to prevent it from sticking to the bottom of the pan and burning. A silicone spatula works great for this.
-
Step 6: Pour and Chill the Caramel
Pour the warm caramel evenly over the cooled shortbread base in the pan. Spread it gently with a spatula to cover the entire surface. Place the pan in the refrigerator for at least 1-2 hours, or until the caramel is firm and set. This is crucial for easy cutting.
-
Step 7: Cut the Bars
Once the caramel is firm, use the parchment paper overhang to carefully lift the entire slab out of the pan. Place it on a cutting board. Using a sharp knife, cut the slab into individual bar shapes. You can make 16 long bars (2×8) or smaller squares. Wipe your knife between cuts for cleaner edges.
Small tip: For super clean cuts, dip your knife in hot water and wipe it dry before each cut.
-
Step 8: Melt the Chocolate Coating
In a microwave-safe bowl or a double boiler, melt the chopped chocolate with the coconut oil (if using). Heat in 30-second intervals in the microwave, stirring well after each, until smooth and glossy. If using a double boiler, stir until fully melted and smooth.
-
Step 9: Dip the Bars
Working one by one, dip each caramel shortbread bar into the melted chocolate. Use a fork or a dipping tool to fully coat the bar, allowing any excess chocolate to drip off. Place the chocolate-coated bars on a clean piece of parchment paper or a wire rack set over parchment paper.
Small tip: If your chocolate starts to thicken, gently reheat it for a few seconds until it’s smooth again.
-
Step 10: Final Chill and Enjoy!
Once all the bars are dipped, place them back in the refrigerator for at least 30 minutes, or until the chocolate coating is completely set and firm. Once set, they are ready to enjoy! Peel them off the parchment paper and savor every decadent bite.
Tips & Variations
- Gluten-Free Option: Easily make these gluten-free by swapping the all-purpose flour for a 1:1 gluten-free baking flour blend in the shortbread base. Ensure your blend contains xanthan gum for best texture.
- Vegan Option: For a delicious vegan version, use plant-based butter (sticks work best), vegan sweetened condensed coconut milk, and dairy-free chocolate. Ensure your golden syrup or corn syrup is also vegan.
- Protein Boost: For a slight protein boost and added crunch, sprinkle finely chopped nuts (like almonds or pecans) over the caramel layer before chilling, or mix them into the melted chocolate coating.
- Spicy Kick: Add a surprising twist by stirring 1/4 teaspoon of cayenne pepper or chili powder into your melted chocolate coating. The subtle heat beautifully complements the sweet chocolate.
- Flavor Variations: Try adding a pinch of sea salt flakes to the top of the melted chocolate before it sets for a salted caramel effect. You can also mix a teaspoon of instant espresso powder into the melted chocolate for a coffee twist, or add a hint of orange zest to the shortbread dough.
Nutritional Information
Approximate values per serving (based on 16 servings):
- Calories: 420 kcal
- Protein: 4g
- Carbohydrates: 55g
- Fat: 22g
Please note: These values are estimates and may vary depending on the specific brands and exact quantities of ingredients used.
Health Benefits
While these Dubai Chocolate Twix Bars are an indulgent treat, some of their key ingredients offer benefits when enjoyed in moderation.
Chocolate: Especially if you opt for a higher percentage dark chocolate, it’s rich in antioxidants called flavonoids. These compounds can help protect your cells from damage and may contribute to heart health. Chocolate also contains minerals like iron, magnesium, and copper, and can even boost your mood by stimulating the production of endorphins.
Butter: While often viewed negatively, real butter provides important fat-soluble vitamins such as Vitamin A, D, E, and K2. These vitamins play crucial roles in vision, bone health, and immune function. Using real butter in baking can also make treats more satisfying, potentially leading to smaller portion sizes.
Sweetened Condensed Milk: This ingredient provides calcium and vitamin D, which are essential for strong bones and teeth. While it is high in sugar, it contributes to the rich, creamy texture of the caramel, making the treat more enjoyable.
Ultimately, the greatest health benefit of these bars might be the joy and satisfaction they bring. Treating yourself to a homemade dessert can be a wonderful way to boost your mental well-being and share happiness with loved ones.
Serving Suggestions
- Serve these decadent bars chilled with a hot cup of coffee or a comforting mug of tea for an afternoon treat.
- They make an absolutely stunning dessert when served alongside a scoop of vanilla bean ice cream, perhaps with a drizzle of extra caramel sauce.
- These bars are perfect as a delightful individual dessert for special occasions, or as part of a dessert platter for parties. They are rich, so a single bar is often perfectly satisfying!
- Meal Prep Ideas: These bars are excellent for making ahead! Prepare a batch on the weekend and store them for easy grab-and-go treats throughout the week or for unexpected guests. They also make wonderful homemade gifts.
Storage Tips
Store your Delicious Dubai Chocolate Twix Bars in an airtight container in the refrigerator. They will keep beautifully for up to 1-2 weeks. You can also freeze these bars for longer storage; wrap individual bars tightly in plastic wrap, then place them in a freezer-safe bag or container. They will keep well in the freezer for up to 3 months. When ready to enjoy, simply thaw them at room temperature for about 15-30 minutes. There is no need to reheat these bars; they are best enjoyed chilled or at room temperature.
Conclusion
And there you have it – your very own batch of Delicious Dubai Chocolate Twix Bars! These treats are more than just a dessert; they’re an experience. With their perfect balance of buttery shortbread, gooey caramel, and rich chocolate, they offer a taste of pure indulgence that feels both familiar and wonderfully luxurious. The joy of creating something so special from scratch is truly unmatched.
I genuinely hope you’ll give this recipe a try. It’s a fantastic project for a weekend afternoon, and the steps are straightforward enough for even beginner bakers to master. The rewarding aroma


