
Introduction
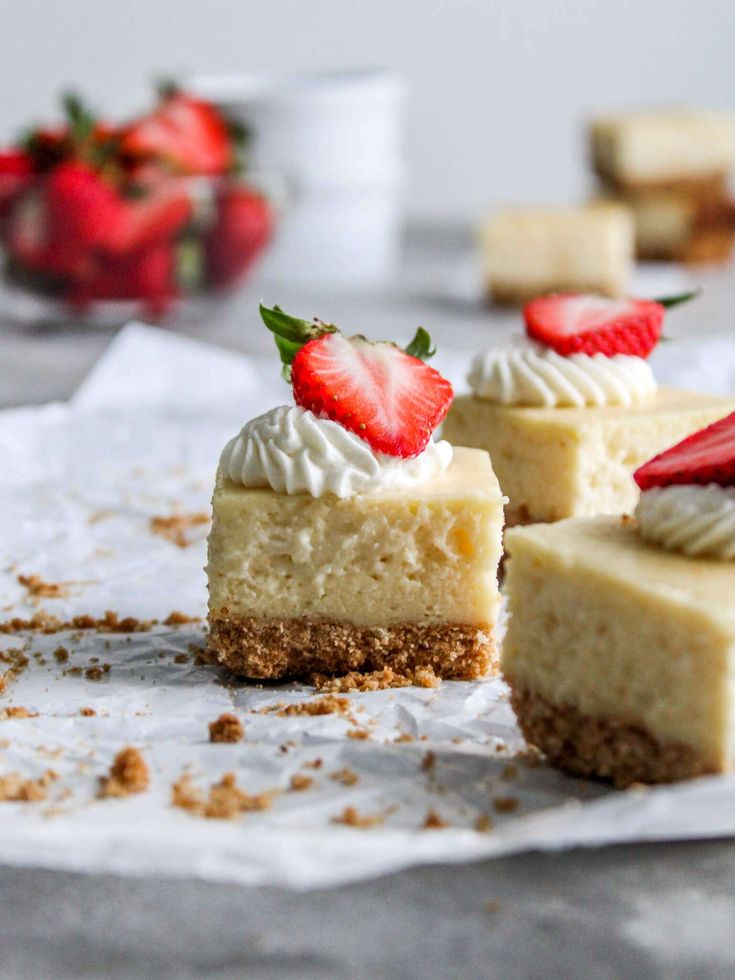
Get ready to meet your new favorite dessert! These “Best Cheesecake Bars Ever” are everything you love about classic cheesecake, but in a much simpler, easier-to-make bar form. Imagine a rich, creamy, and perfectly tangy cheesecake filling sitting atop a buttery, crisp graham cracker crust. Each bite is pure bliss, a delightful balance of sweet and smooth that will leave you wanting more.
The best part? You don’t need a water bath, fancy equipment, or hours of waiting for cracks to magically disappear. This recipe is designed for ease and convenience, making it perfect for novice bakers and seasoned pros alike. You’ll be amazed at how quickly these come together, leaving you more time to enjoy the delicious results without any stress.
So, whether you’re planning a party, looking for a simple treat, or just craving something truly special, these cheesecake bars are your answer. They’re a guaranteed crowd-pleaser, easy to transport, and utterly irresistible. Trust us, once you try this recipe, it will become a staple in your kitchen. Let’s get baking!
Cooking Time & Prep Time
- Prep Time: 25 minutes
- Cooking Time: 35 minutes
- Total Time: 60 minutes (plus chilling time)
Small tip: The chilling time is crucial for perfectly set bars, so don’t rush it! Plan to make these at least 4 hours ahead, or even the day before.
Ingredients
Makes 16 bars
For the Graham Cracker Crust:
- 1 ½ cups (about 10-12 full sheets) graham cracker crumbs
- ¼ cup granulated sugar
- ½ cup (1 stick) unsalted butter, melted
For the Cheesecake Filling:
- 2 (8-ounce) packages cream cheese, softened
- ¾ cup granulated sugar
- 2 large eggs
- 1 teaspoon vanilla extract
- ¼ cup sour cream (or full-fat plain Greek yogurt)
- 1 tablespoon fresh lemon juice (optional, but highly recommended for tang)
Step-by-Step Instructions
-
Preheat Oven and Prepare Pan
Preheat your oven to 325°F (160°C). Line a 9×13 inch baking pan with parchment paper, leaving an overhang on the sides. This makes it super easy to lift the bars out later. Lightly grease the exposed parts of the pan if needed.
Small tip: The parchment paper overhang acts as handles, making removal effortless and mess-free.
-
Make the Graham Cracker Crust
In a medium bowl, combine the graham cracker crumbs, ¼ cup granulated sugar, and melted butter. Mix well until the crumbs are evenly moistened and resemble wet sand. Press this mixture firmly and evenly into the bottom of your prepared pan. Bake the crust for 8-10 minutes, just until lightly golden. Remove from the oven and set aside to cool slightly while you prepare the filling.
Small tip: Use the bottom of a flat glass or measuring cup to press the crust down firmly for a compact base.
-
Prepare the Cheesecake Filling Base
In a large mixing bowl, using an electric mixer, beat the softened cream cheese on medium speed until smooth and creamy. Scrape down the sides of the bowl. Add ¾ cup granulated sugar and beat until well combined and fluffy, about 2-3 minutes.
Small tip: Make sure your cream cheese is truly softened to room temperature. This prevents lumps and ensures a smooth filling.
-
Add Eggs and Flavorings
Add the eggs, one at a time, beating on low speed after each addition just until combined. Be careful not to overmix once the eggs are in. Stir in the vanilla extract, sour cream (or Greek yogurt), and fresh lemon juice (if using). Mix until everything is just incorporated and the filling is smooth.
Small tip: Overmixing after adding eggs can incorporate too much air, which can lead to cracks in your cheesecake. Mix just until combined!
-
Assemble and Bake
Pour the cheesecake filling evenly over the slightly cooled graham cracker crust in the prepared pan. Gently spread it to the edges. Bake for 30-35 minutes, or until the edges are set and slightly golden, but the center still has a slight jiggle when gently shaken. It will continue to set as it cools.
Small tip: Don’t open the oven door too often during baking. This can cause temperature fluctuations that might affect the cheesecake’s texture.
-
Cool and Chill
Remove the pan from the oven and let it cool completely on a wire rack at room temperature. Once cooled, cover the pan loosely with plastic wrap and transfer it to the refrigerator. Chill for at least 4 hours, or preferably overnight, to allow the bars to fully set.
Small tip: Chilling is non-negotiable for perfect, firm cheesecake bars that slice beautifully. Patience is key here!
-
Slice and Serve
Once thoroughly chilled, use the parchment paper overhang to lift the entire cheesecake out of the pan and onto a cutting board. Use a sharp knife, wiping it clean between each cut, to slice the cheesecake into 16 even bars. Serve cold and enjoy!
Small tip: For super clean cuts, dip your knife in hot water and wipe it dry before each slice.
Tips & Variations
- Gluten-Free Option: Easily make these bars gluten-free by using gluten-free graham crackers for the crust. The filling is naturally gluten-free!
- Vegan/Vegetarian Option: For a vegan version, substitute dairy cream cheese with a high-quality vegan cream cheese, use plant-based butter, and replace eggs with a suitable egg replacer (such as flax eggs or a commercial egg substitute). Note that the texture may vary slightly.
- Adding More Nutrients or a Healthier Twist: While a dessert, you can add finely chopped nuts (like walnuts or pecans) to the crust for healthy fats and fiber. Top the finished bars with fresh berries (strawberries, blueberries, raspberries) for antioxidants and vitamins.
- Spicy Version: For a subtle kick, add a tiny pinch (⅛ teaspoon) of cayenne pepper to the graham cracker crust mixture. Or, create a spicy berry compote to drizzle over the top by simmering berries with a touch of sugar and a pinch of chili powder.
- Other Flavor Variations: Swirl in fruit preserves (raspberry, cherry) or caramel sauce into the filling before baking. You can also use different crusts like crushed Oreo cookies or shortbread biscuits for a unique flavor profile. A sprinkle of chocolate chips on top before baking is always a win!
Nutritional Information
Approximate values per serving (based on 16 servings):
- Calories: 280-320 kcal
- Protein: 4-6g
- Carbohydrates: 25-30g
- Fat: 18-22g
Note: Values may vary depending on specific ingredients used and portion size.
Health Benefits
While these are a delicious treat, some ingredients do offer nutritional benefits:
- Cream Cheese: Provides calcium for strong bones and teeth, and a good amount of protein which is essential for muscle repair and growth. Remember to enjoy in moderation as part of a balanced diet.
- Eggs: A fantastic source of high-quality protein, essential amino acids, and choline, which is vital for brain health and metabolism. Eggs also contain Vitamin D and B12.
- Graham Crackers: If you opt for whole wheat graham crackers, you’ll get a dose of dietary fiber, which aids digestion and can help maintain stable blood sugar levels.
- Lemon Juice: Even a small amount adds a burst of Vitamin C, an important antioxidant that supports the immune system and skin health.
- The Joy Factor: Don’t underestimate the power of comfort food! Enjoying a delicious treat can boost your mood and provide a sense of satisfaction, contributing to overall mental well-being.
Serving Suggestions
- Classic Toppings: Serve these bars chilled with a dollop of fresh whipped cream and a scattering of fresh berries (strawberries, blueberries, raspberries) for a beautiful presentation and added freshness.
- Sauce Drizzle: Drizzle with chocolate sauce, caramel sauce, or a homemade fruit compote for an extra layer of flavor.
- Beverage Pairings: These bars pair wonderfully with a hot cup of coffee, a soothing tea, or a cold glass of milk.
- Meal Prep Ideas: These cheesecake bars are perfect for making ahead! Prepare them the day before a party or gathering. You can also cut them into individual portions and pack them for a delightful treat in lunchboxes.
Storage Tips
Store leftover cheesecake bars in an airtight container in the refrigerator for up to 5-7 days. They can also be frozen! Wrap individual bars tightly in plastic wrap, then place them in a freezer-safe bag or container for up to 1 month. Thaw frozen bars in the refrigerator overnight before serving. These bars are best served chilled and do not typically require reheating.
Conclusion
And there you have it – the recipe for the Best Cheesecake Bars Ever! These bars truly live up to their name, offering all the rich, creamy, and tangy goodness of a traditional cheesecake without any of the fuss. They’re incredibly satisfying, delightfully easy to make, and always disappear fast at any gathering.
Don’t be intimidated by making cheesecake. This bar version simplifies the process, making it accessible for everyone. Once you try that first bite, you’ll understand why this recipe is a keeper. It’s the perfect balance of flavors and textures, promising pure dessert enjoyment every single time.
So go ahead, preheat that oven, gather your ingredients, and whip up a batch of these amazing cheesecake bars. They’re perfect for sharing with family and friends, bringing to a potluck, or simply enjoying as a well-deserved treat for yourself. Happy baking!


