
Introduction
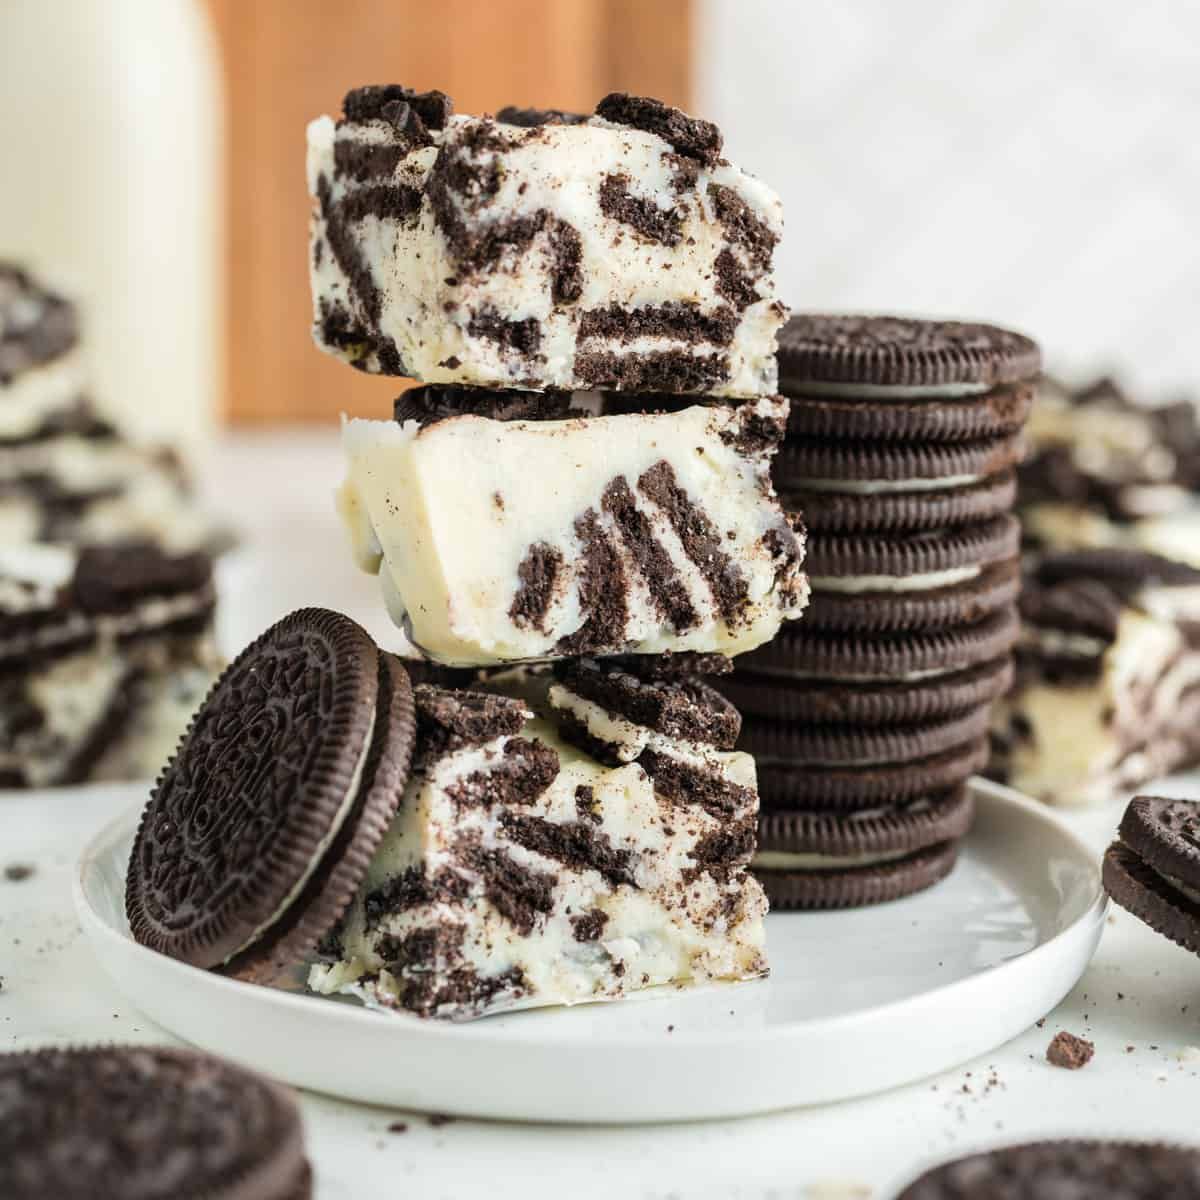
Get ready for a treat that will make your taste buds sing! This No Bake Peanut Butter Oreo Fudge is an absolute dream come true for anyone who loves the classic combination of creamy peanut butter and crunchy chocolate cookies. It’s rich, it’s decadent, and it has that perfect balance of sweet and salty that keeps you coming back for more. Every bite offers a delightful texture contrast, making it truly special.
The best part? You don’t need to turn on your oven or be a pastry chef to make this incredible fudge. It comes together in just a few simple steps with common pantry ingredients. It’s truly a no-fuss recipe, perfect for busy days or when you need a quick dessert that looks and tastes impressive. Forget complicated techniques; this recipe is all about easy deliciousness.
So, whether you’re looking for a quick dessert for unexpected guests, a delightful treat for a party, or just a little something sweet to enjoy yourself, this recipe is for you. Dive into the world of effortless indulgence and prepare to fall in love with this No Bake Peanut Butter Oreo Fudge. You simply have to try it!
Cooking Time & Prep Time
- Prep Time: 20 minutes
- Cooking Time: 0 minutes (no baking required!)
- Chilling Time: 2 hours (minimum)
- Total Active Time: 20 minutes
Small tip: To make your prep time even quicker, gather all your ingredients and equipment before you start mixing. This is called “mise en place” and it makes the cooking process much smoother!
Ingredients
This recipe makes approximately 24 servings (when cut into 1-inch squares).
- 1/2 cup (1 stick) unsalted butter
- 1 cup creamy peanut butter (such as Jif or Skippy)
- 3 cups powdered sugar (confectioners’ sugar)
- 1 teaspoon pure vanilla extract
- 15 Oreo cookies (standard size), crushed
Step-by-Step Instructions
-
Step 1: Prepare Your Pan
Line a 9×9 inch square baking pan with parchment paper. Make sure the paper hangs over the sides a bit; this will create “handles” to easily lift the fudge out later. A little cooking spray on the pan before the parchment can help it stick better.
Small tip: Don’t skip the parchment paper! It makes removing and cutting the fudge incredibly easy and mess-free.
-
Step 2: Crush the Oreos
Place the 15 Oreo cookies into a large zip-top bag. Seal the bag, removing as much air as possible. Use a rolling pin or the bottom of a heavy glass to crush the cookies into coarse crumbs. You want a mix of fine crumbs and small chunks for texture.
Small tip: For an even quicker crushing process, you can pulse the cookies in a food processor a few times until you reach your desired consistency. Be careful not to over-process into a powder.
-
Step 3: Melt Butter and Peanut Butter
In a large microwave-safe bowl, combine the unsalted butter and creamy peanut butter. Microwave on high for 60-90 seconds, stirring halfway through, until the mixture is completely melted and smooth. Alternatively, you can melt them together in a saucepan over low heat on the stovetop, stirring constantly.
Small tip: Ensure the butter and peanut butter are fully melted and well combined to create a smooth base for your fudge. This helps prevent a grainy texture.
-
Step 4: Add Powdered Sugar and Vanilla
Remove the bowl from the microwave (or heat). Add the powdered sugar and vanilla extract to the melted peanut butter mixture. Stir vigorously with a sturdy spoon or spatula until everything is thoroughly combined and a thick, smooth fudge forms. It will be quite stiff.
Small tip: If the mixture seems too dry, add a tiny bit more melted butter (1/2 teaspoon at a time) until it comes together. If it’s too soft, add a tablespoon more powdered sugar.
-
Step 5: Fold in Crushed Oreos
Add the crushed Oreo cookies to the fudge mixture. Gently fold them in until they are evenly distributed throughout the fudge. Try not to overmix, as you want to keep some of those delightful cookie chunks intact.
Small tip: Use a rubber spatula for folding to scrape the sides of the bowl effectively and ensure all the cookie pieces are incorporated.
-
Step 6: Press into the Pan
Transfer the fudge mixture into your prepared 9×9 inch pan. Use the back of a spoon or your hands (lightly greased with butter or cooking spray) to press the fudge firmly and evenly into the pan. Make sure the top is as smooth as possible.
Small tip: Pressing firmly helps the fudge set compactly and prevents it from crumbling when cut.
-
Step 7: Chill Until Set
Place the pan in the refrigerator and chill for at least 2 hours, or until the fudge is completely firm. For best results, you can even chill it overnight. This setting time is crucial for perfect slices.
Small tip: Resist the urge to cut the fudge too early! A fully chilled fudge will slice cleanly and hold its shape beautifully.
-
Step 8: Cut and Serve
Once firm, use the parchment paper handles to lift the fudge out of the pan and onto a cutting board. Use a sharp knife to cut the fudge into 1-inch squares. Wipe the knife clean between cuts for the neatest edges.
Small tip: For extra clean cuts, run your knife under hot water and wipe it dry before each slice. This makes slicing through the dense fudge much easier.
Tips & Variations
- Gluten-Free Option: Simply swap out the standard Oreo cookies for a certified gluten-free cream-filled chocolate sandwich cookie. Many brands now offer delicious gluten-free alternatives that work perfectly in this recipe.
- Vegan/Vegetarian Option: This recipe is naturally vegetarian. To make it vegan, use a plant-based butter substitute (like Miyoko’s Kitchen or Earth Balance vegan butter sticks) and ensure your peanut butter and sandwich cookies are certified vegan. Many popular cream-filled chocolate cookies are accidentally vegan, but always double-check the ingredient list.
- Boosted Nutrition: For a little extra protein and fiber, consider folding in 1/4 cup of finely chopped nuts (like peanuts, almonds, or walnuts) along with the Oreos. You could also sprinkle a tablespoon of chia seeds into the mix for omega-3s, though it might change the texture slightly.
- Spicy Kick: If you love a little heat with your sweet, add a tiny pinch (1/8 to 1/4 teaspoon) of cayenne pepper or chili powder to the melted peanut butter mixture in Step 4. It creates a surprisingly delightful warmth that complements the chocolate and peanut butter.
- Flavor Fun: Get creative! Swirl in 1/2 cup of melted dark chocolate over the top before chilling for a beautiful marbled effect and extra chocolatey goodness. You could also use different flavored sandwich cookies, like mint Oreos, for a unique twist, or add a handful of mini chocolate chips to the mixture.
Nutritional Information
Approximate values per serving (based on 24 servings):
- Calories: 220-250 kcal
- Protein: 4-6 g
- Carbohydrates: 25-30 g
- Fat: 15-18 g
Please note: These values are approximate and may vary depending on the specific brands and exact amounts of ingredients used. This fudge is an indulgent treat, best enjoyed in moderation!
Health Benefits
While this is certainly a treat, some of the main ingredients do offer notable health benefits:
- Peanut Butter Power: Peanut butter is a fantastic source of plant-based protein, which is essential for muscle repair and growth. It also contains healthy monounsaturated and polyunsaturated fats, which can help support heart health when consumed as part of a balanced diet.
- Vitamin E Boost: Peanut butter is rich in Vitamin E, a powerful antioxidant that helps protect cells from damage. It also provides B vitamins, important for energy metabolism, and minerals like magnesium, which plays a role in over 300 bodily functions.
- Fiber for Digestion: The peanuts in peanut butter contribute dietary fiber. Fiber is crucial for digestive health, helping to keep things moving smoothly and contributing to a feeling of fullness.
- Energy Source: The combination of healthy fats, protein, and carbohydrates in this fudge provides a quick and sustained energy boost, making it a satisfying pick-me-up. Just remember to enjoy it in smaller portions!
Serving Suggestions
- Perfect Dessert Bite: Serve these rich fudge squares alongside a hot cup of coffee, a cold glass of milk, or a scoop of vanilla ice cream for an ultimate dessert experience.
- Party Platter Star: Arrange the fudge on a festive platter with other small treats like cookies, brownies, or fresh fruit. It’s always a crowd-pleaser at gatherings and potlucks.
- Thoughtful Gift: Package a few pieces of fudge in a decorative box or bag for a homemade gift that friends, family, or neighbors will absolutely adore.
- Anytime Treat: Keep a stash in your fridge for when you need a little something sweet after dinner or a quick energy boost during the day.
Storage Tips
Store any leftover No Bake Peanut Butter Oreo Fudge in an airtight container in the refrigerator for up to 1-2 weeks. It actually tastes even better chilled! This fudge also freezes beautifully. You can freeze individual squares in an airtight container or freezer bag for up to 2-3 months. Thaw frozen fudge at room temperature for about 15-20 minutes before serving. No reheating is needed; this fudge is always best enjoyed cold or at room temperature.
Conclusion
And there you have it – a recipe for the most delightful No Bake Peanut Butter Oreo Fudge that’s as easy to make as it


